Boondock Heater/Connection
Some folks wouldn't ever think of living in their RV without the comfort and convenience of having electric and water hookups. Then there are those RVers who occasionally suffer the inconvenience of not having hookups— at their favorite hunting or fishing spot, or for the annual boondock extravaganza of the RV America gathering in Quartzsite, Arizona.
Newbies to boondocking soon discover that trying to boondock using their RV furnace doesn't work too well. Sure, the furnace heats up the RV very nicely, but running the furnace overnight to keep warm usually results in almost-dead house batteries the next morning. (The furnace fan motor pulls a lot of Amps, and can quickly drain your house batteries.)
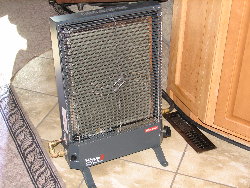
RVers with a bit more experience under their belts soon open their wallets for small catalytic propane heaters. There are some catalytic heaters that are made for RV use—and they are equipped with both an Oxygen Depletion Sensor (ODS) and a tip-over cutoff switch.
Catalytic heaters put out more heat (per BTU) than blue flame heaters, most have efficiencies in excess of 99%, and they can be run off of a separate propane bottle or be connected to the propane lines in your RV.
A catalytic heater usually has no fan, so no electricity is required for its operation.
All propane heaters use oxygen for combustion, and an Oxygen Depletion Sensor is a very necessary safety feature when the heater is used inside an RV. An ODS senses the amount of oxygen in the air and will shut off the heater if oxygen levels reach an unsafe low level. Some of these heaters with an ODS will only operate reliably when the RV is at an altitude of less than 6,500 feet, whereas others will work just fine at altitudes of almost 12,000 feet. Check the specifications on the heater you plan to buy—before you buy it.
For only occasional use, many RVers just use a regular 20 lb. propane bottle (the common size found on most BBQs). Though not recommended, most users just put the propane bottle on the bottom entry step inside their RV, attach a regulator and a 5 or 12-foot hose to the LP tank, and then put the propane heater facing toward the bedroom. (Putting a propane tank inside the RV is not recommended, and it is also awkward and inconvenient—but does the job when occasionally needed.)
When using a propane heater inside your RV, it is wise to open a vent just a wee bit, so that there is a source of fresh air into the RV. The purists will open a bedroom window just a wee bit and also crack the ceiling vent in the kitchen—thus allowing fresh air to enter the bedroom and exit over the kitchen area.
It goes without saying that the heater should be kept away from flammable surfaces, especially above the heater.
RVers who regularly use a catalytic heater often prefer the convenience of simply "plugging in" their heater to a handy propane line whenever the heater is needed.
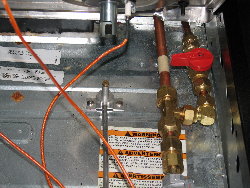
In most RVs, the easiest location to "tap into" the propane line is under the cooktop. A low pressure propane line is usually easily spotted when you lift up the burner section.
Tapping into the stove-top propane line is a fairly simple matter of disconnecting the propane line where it attaches to the stove top, inserting a 3/8" or 1/2" flare-style "T", re-attaching the RV propane line to the "T", attaching another piece of 3/8" copper tubing to the "T", and running the new copper tubing to wherever the quick- disconnect fitting is desired.
For ease of connecting and disconnecting the propane heater, many folks add a quick-disconnect fitting somewhere near the stove. A quick-disconnect fitting allows the heater to be connected or disconnected very easily, without requiring the use of any tools.
Many RVers, being leery of leaking propane, have an inate distrust of the shut-off valve built into the quick- disconnect fitting, so they add a manual shut off valve between the source of propane and the quick-disconnect fitting—always turning off the manual gas valve whenever the catalytic heater is not connected.
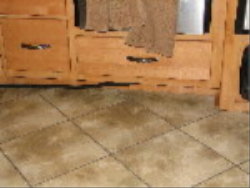
We particularly like the setup in our motorhome. Lifting the stove top provides easy access to the manual heater shut-off valve, and the quick-disconnect fitting is hidden up under (and behind) the toe kick space under the oven—nothing is visible when the catalytic heater is not connected!
 |
|
 |
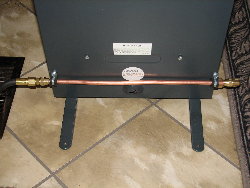
We noticed that the gas connection on the catalytic heater was on the wrong side (sticking out into the room— when the heater was pointed to its usual position toward the rear of the motorhome), so we decided to add the "King heater mod" (named after Richard King who did this first on his own heater) to our heater.
Using a few more brass LP fittings, we routed the gas inlet connection to the right side of the heater (instead of the left side). The copper tubing is held in place by two clamps on the back of the heater case. Now, when the heater is facing the rear of the coach, the gas inlet is on the side nearest the sink, and the gas hose is not sticking out into the middle of the room.
 |
|
 |